


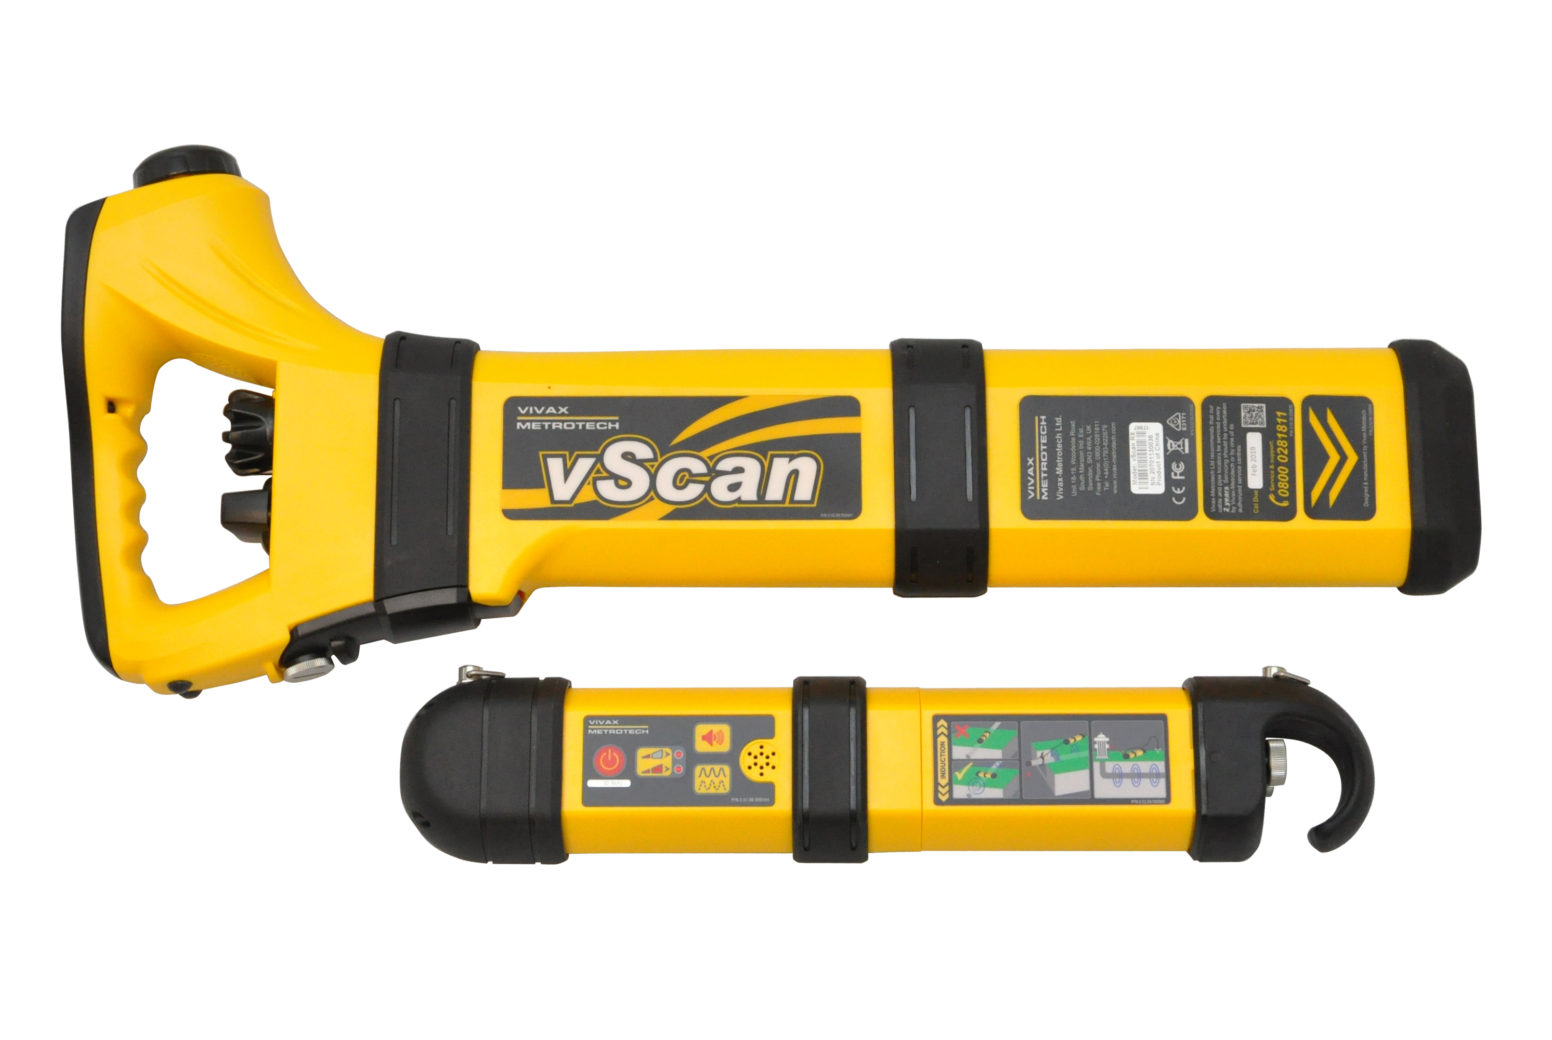
The vScan is the device for pipe and cable location on construction sites. You don’t need to be an expert to achieve good results quickly and easily with this system. The main features and operation are adapted to industry standards, so a brief introduction is all you need to start working effectively with the system right away.


In our tutorial on LTE data transmission, Martin Esders explains very briefly, using the smart memo, how to send your test report as a PDF document by e-mail after a completed test.

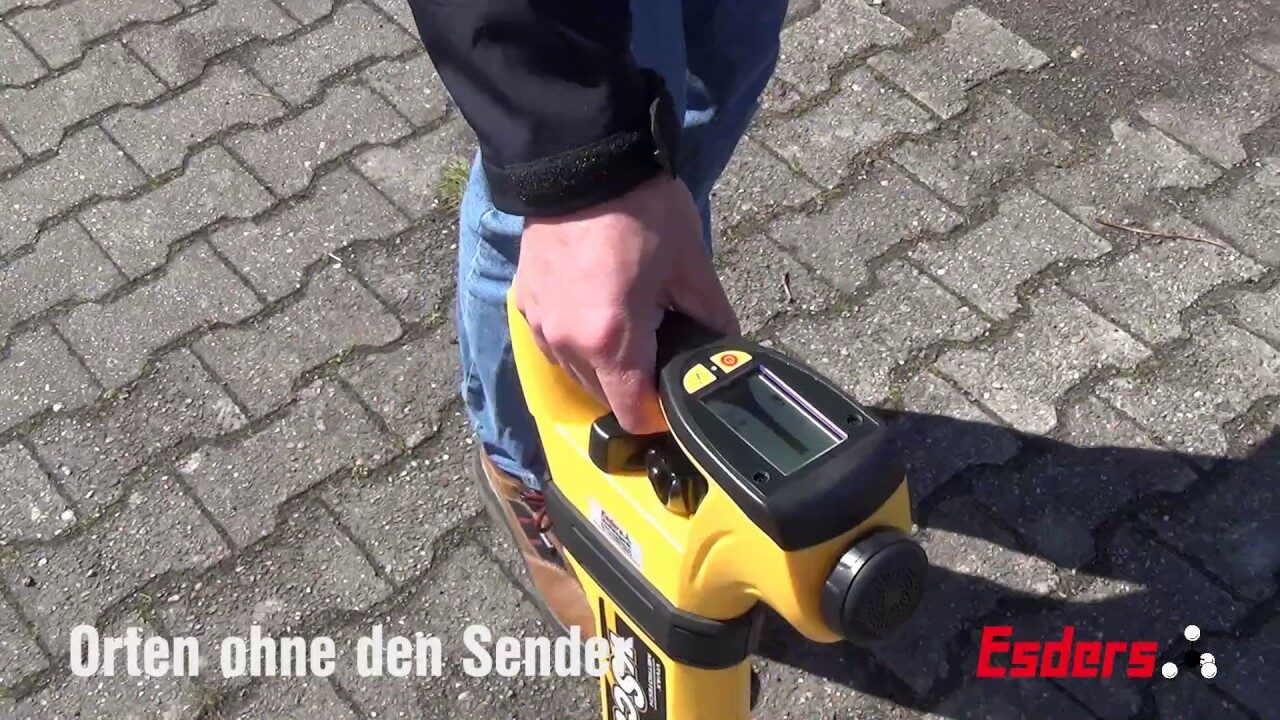
How does the pairing and detection of external sensors work?
– Device in use: smart memo pressure measuring case.

DVGW W 400-2
Preliminary test
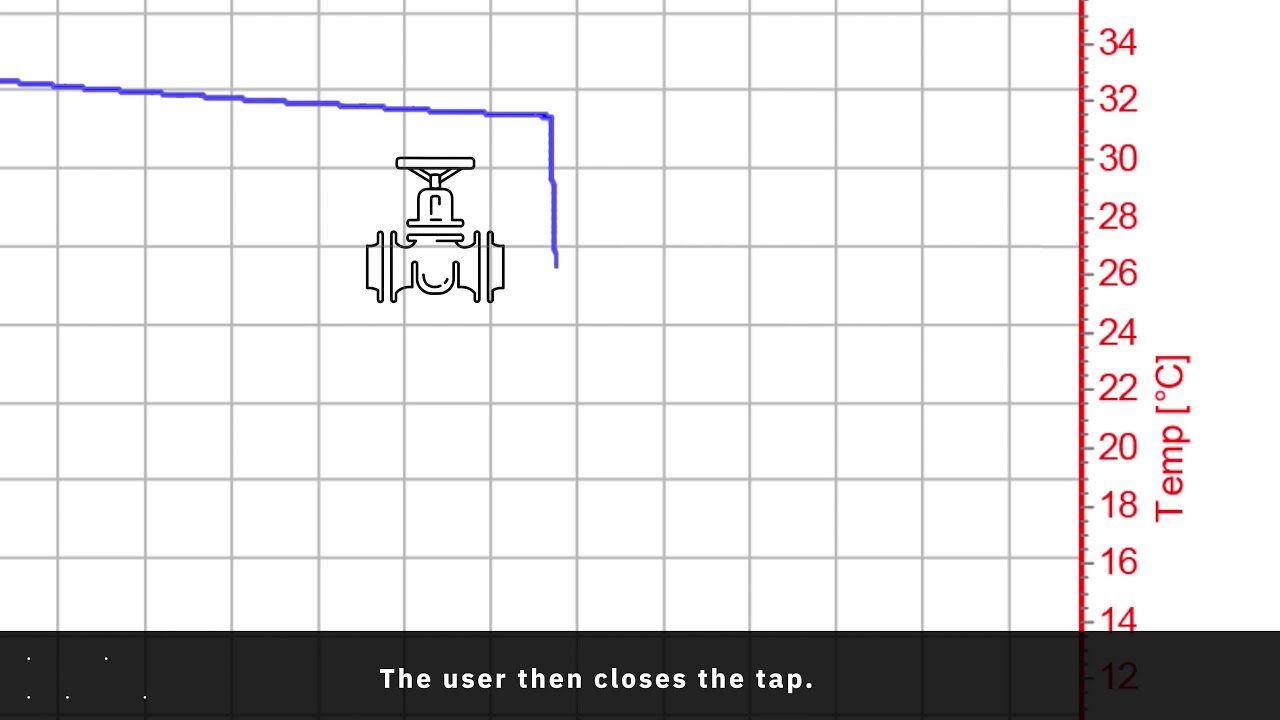
We have just come from the preliminary test and are doing the pressure release test now.
The pressure is dropping.
For example: The target pressure is 3200 mbar.
The device registers this as soon as it has been reached.
It gives an acoustic signal and also displays a message on the screen.
The user then closes the tap.
The pressure drops a little more due to the reaction time.
But then the pressure rises again due to the contraction.
At 20 mbar, which is how the device is programmed, the switchover to the main test takes place.
Condition: Target drain reached and pressure increases.
The condition is: drainage is to be achieved and a pressure increase must have taken place.
A short time later, the query for the drained volumes appears.
The user has to enter this, but otherwise no other things to consider.
During the entire test he only has to wait for the device to tell him:
Target drainage is reached.
And later he will be notified of the query for the volumes.
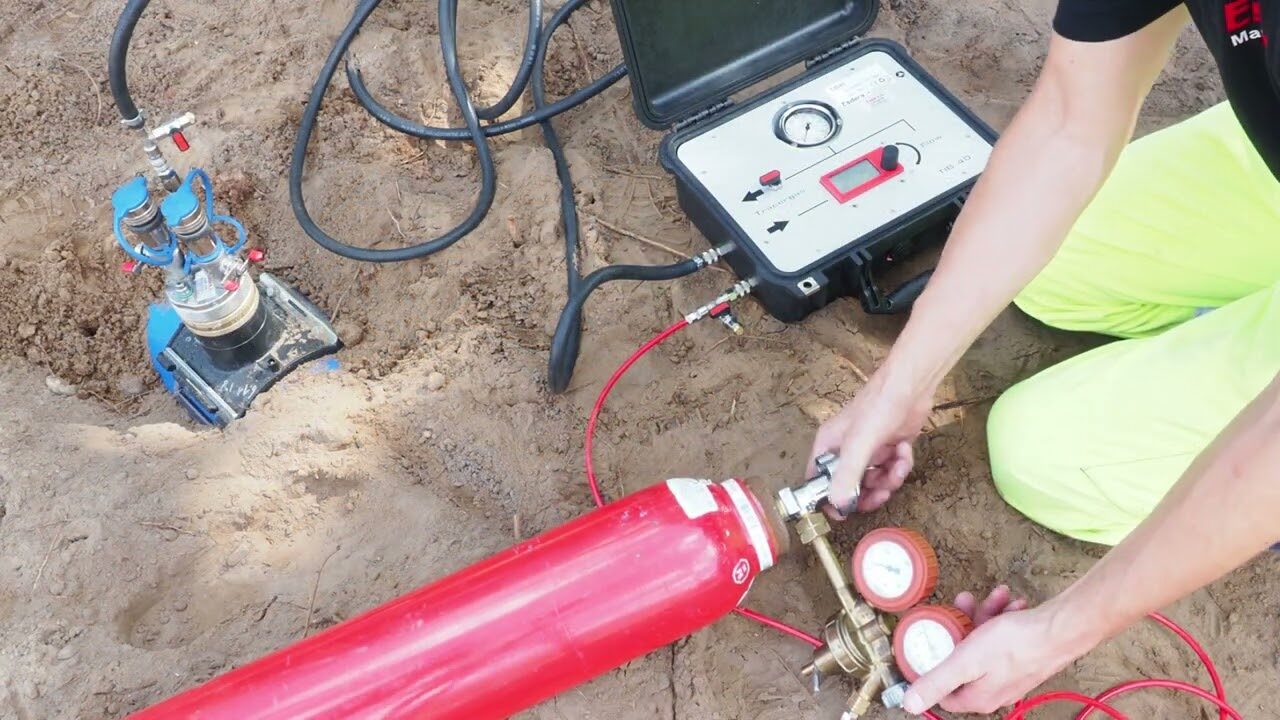
We are working with our compact compressor KK60, which is connected to our test head HEINZ.
The pipeline is a PE pipeline – outer diameter 225 SDR 11.
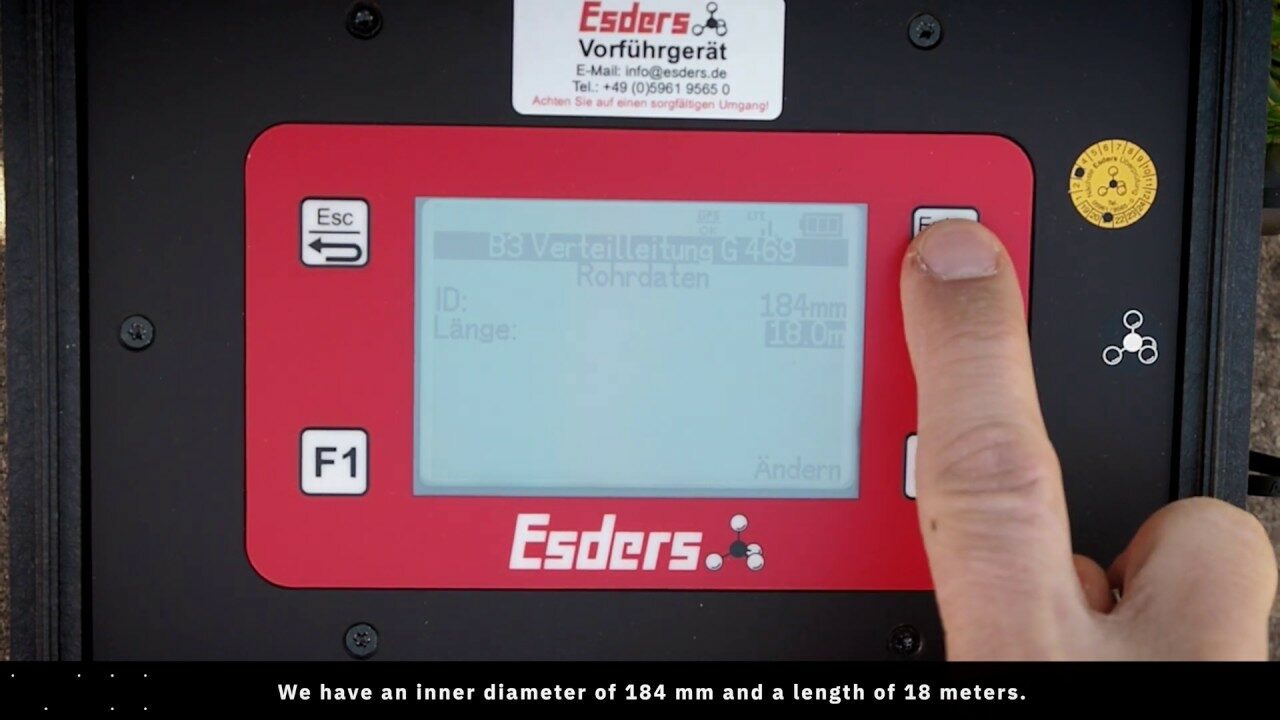
We select the menu item B3 Supply line G 469 in the main menu.
First of all, the pipe specifications are entered into the device. We have an inner diameter of 184 mm and a length of 18 meters.
Up to three different pipe sections can be entered into the device.
We have an MOP of 1 bar. The line is grounded.
The permissible pressure change is now adjustable from 0-50 mbar.
The stabilisation time is three hours and the test time 30 minutes.
With F2 we get to the next point.
Summary: Here we can check the entered data again.
We set the zero point. And then the pressure input is carried out with the KK60.
By beeping, the device signals that the test pressure of 3 bar has been reached. Now we are going into the stabilisation phase of 3 hours. After the three-hour stabilisation phase, we automatically enter the test phase: here the pressure is displayed, the starting pressure, the pressure drop and the remaining time. By scrolling through with F1 we see the display: Pressure drop per hour. By scrolling through again we can see the pressure curve in the test phase. The pressure drop is 8 mbar. You can see a small, falling trend in the curve, but it will pass the test.
The starting pressure was 2939 mbar and the final pressure is 2931 mbar. This gives us a pressure drop of 8 mbar with a permissible pressure drop of 50 mbar.
Thus the test was successfully passed.
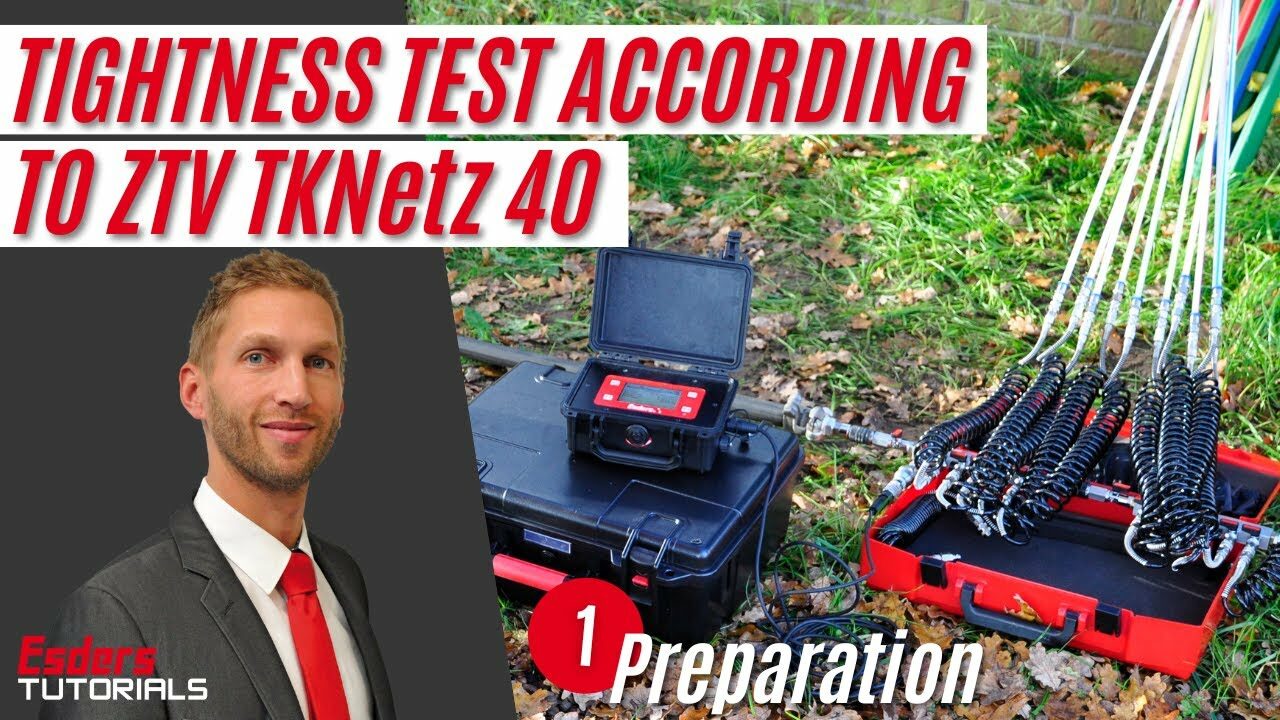
Part 1: Preparation and connection of the accessories
Part 2: Performing the test


First of all, we do not use the normal hydrophobic filter membranes any more but the new improved EFi 1.
This not only protects the device from water but also from dust.
The dust filter also protects the membranes.
To change the dust filter we screw on the union nut.
Here you can check if the dust filter is covered with dust.
You can change the dust filter separately and you should do this relatively often, because the more often you change it, the better you protect the hydrophobic membranes which are very sensitive.
Then you take the union nut and tighten it hand-hot.
If you want to change the whole EFi we proceed exactly the same way as with the dust filter, take it out and you can now remove the rest of the filter unit.
Here you also see the two hydrophobic filters again.
Then you take a new EFi 1, insert it here and screw the union nut on the device, tighten the whole thing hand-tight.
To check whether the union nut is tight and sufficiently sealed, you turn on the device and carry out a pump test.
This way you are able to block the gas path completely, which means that no air is drawn past the union nut.
And with that the filter change is completed.

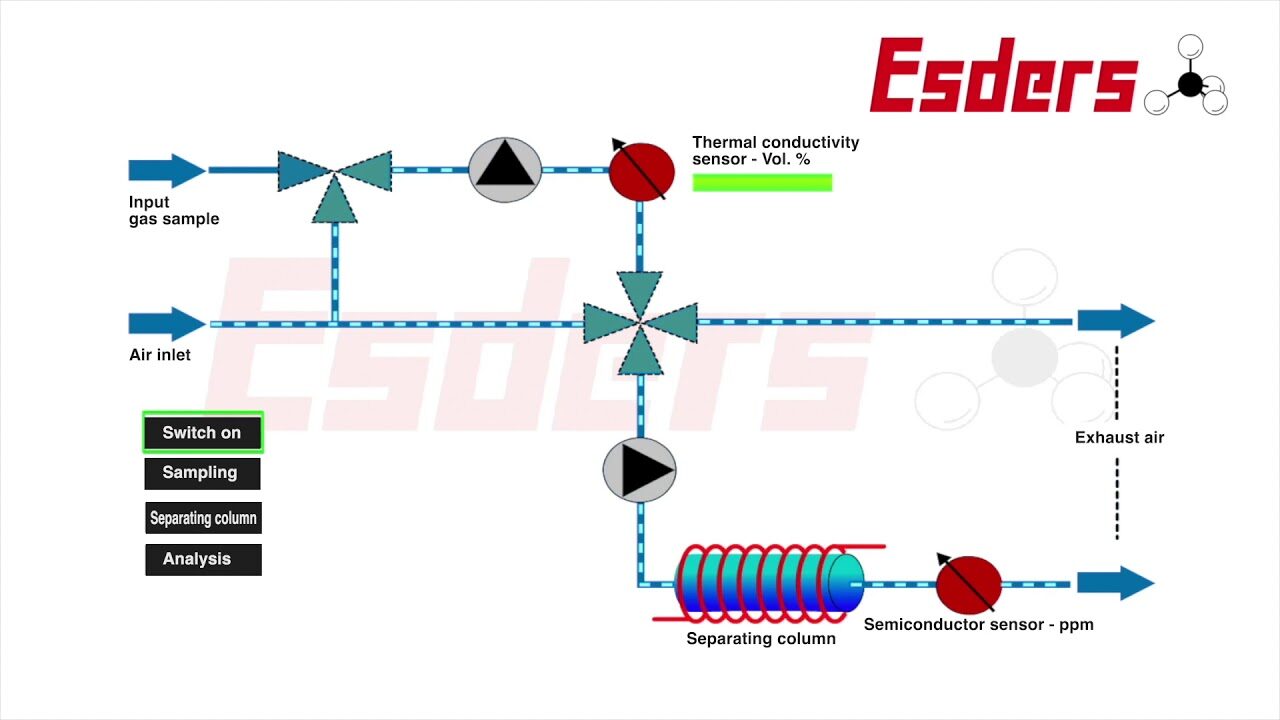
Select the menu option Bump Test in the main menu. First start with the sensor run-in phase in which the sensors have to be purged in pure air.
In the menu point Bump Test, the device is checked for the following:
Free flow of the gas paths in the measuring device,
Reactivity of the measuring device to test gas,
Intact sensors, alarms (optical, acoustic and vibration)
First the zero point can be set.
Then press Start.
The device displays “Please add test gas”.
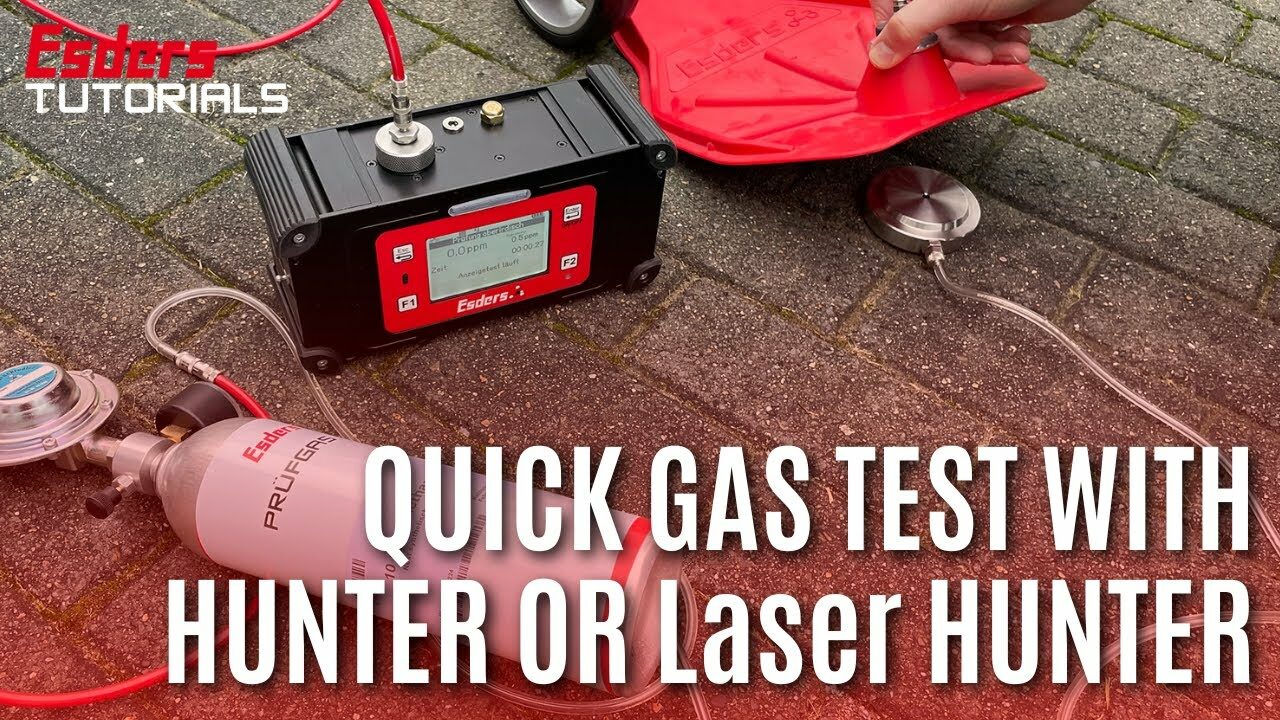
In the case of the OLLI I apply the 5K gas (5 components gas).
Test gas can 5 components 1,65 Ltr 35 bar
2.2 % CH4, 150 ppm CO, 2.5% CO2, 15% O2, 25 ppm H2S, rest N2
Capacity: 58 litres
Only when the checkboxes are filled in, the bump test is passed and can be verified.
The bump test can now be completed with Enter.
Please remove test gas.
Now the bump test is completed successfully.


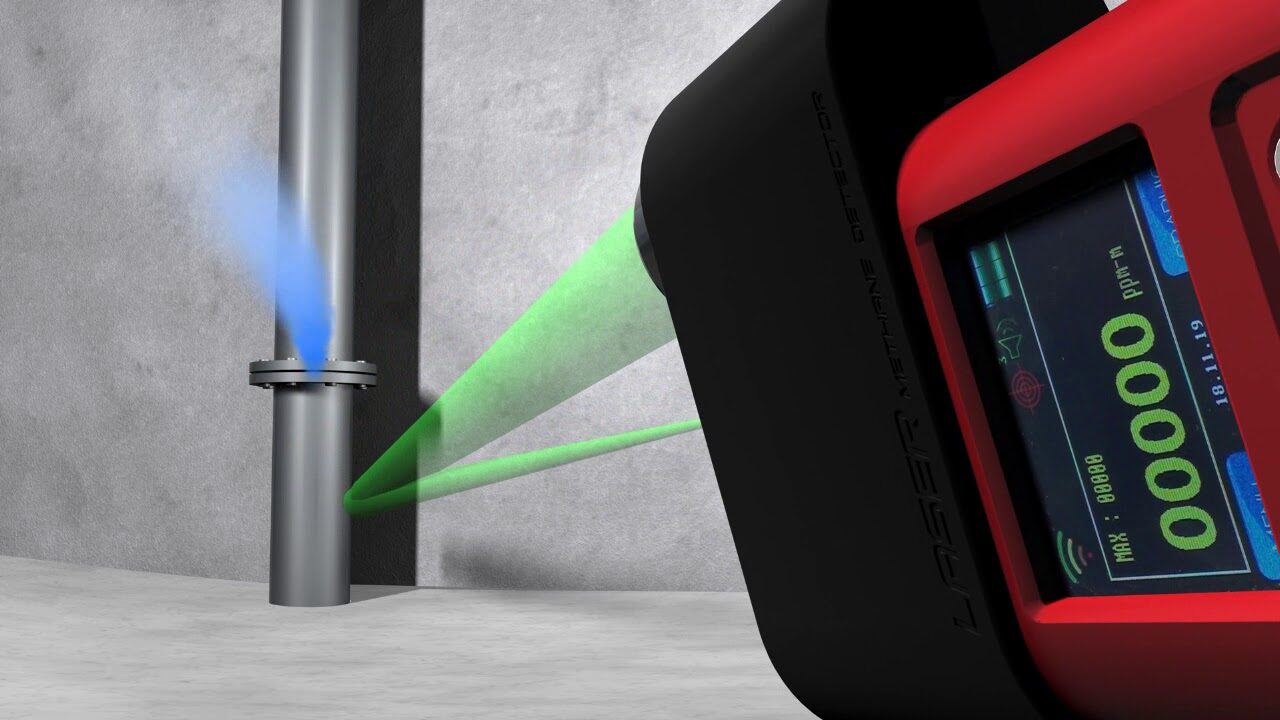
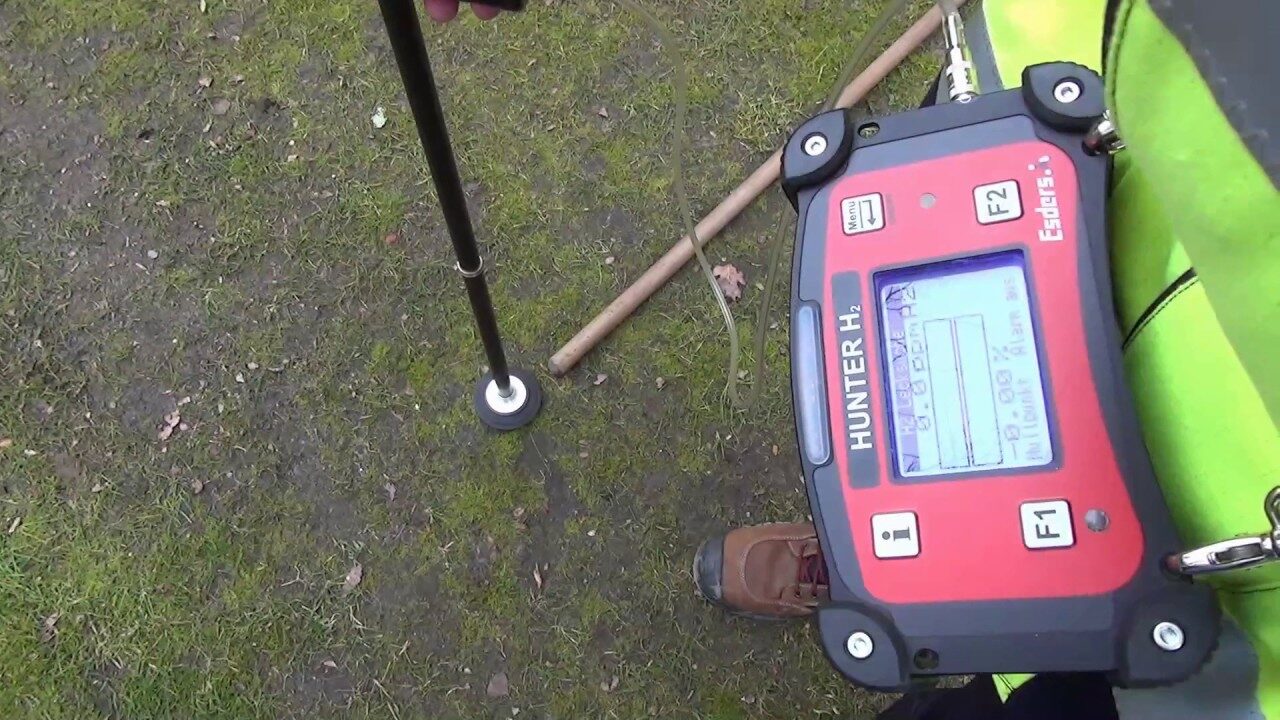
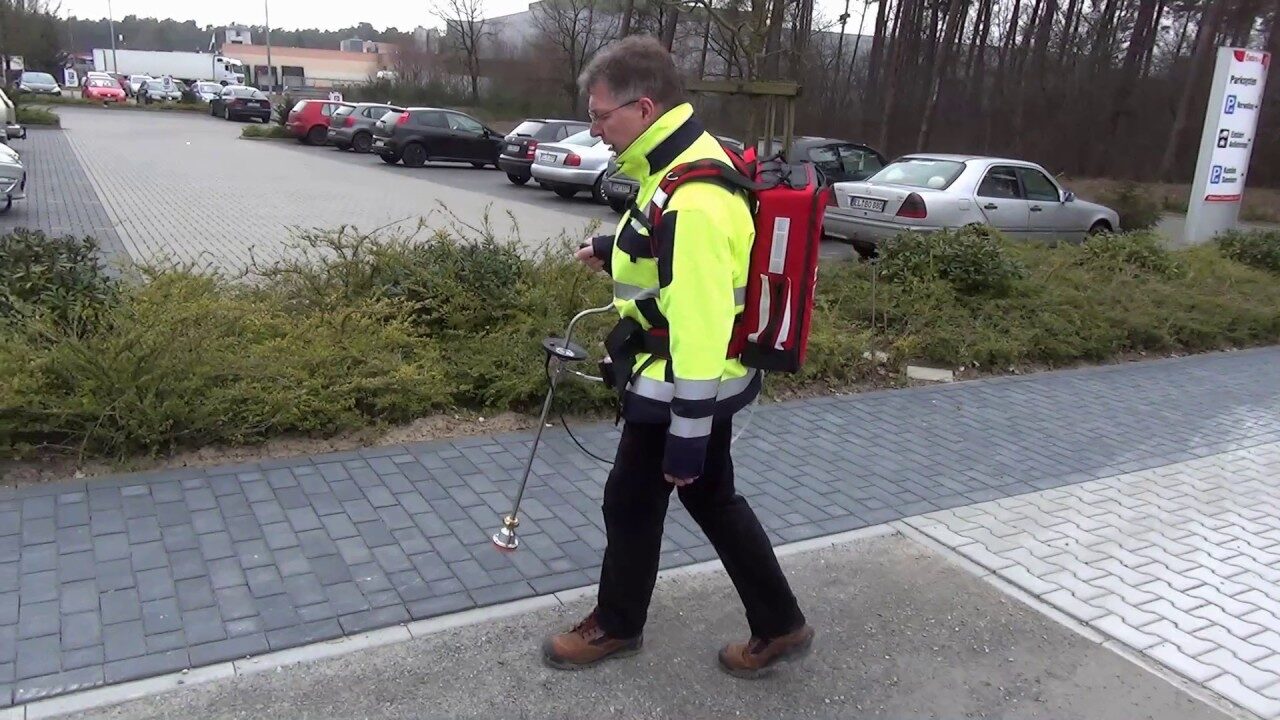
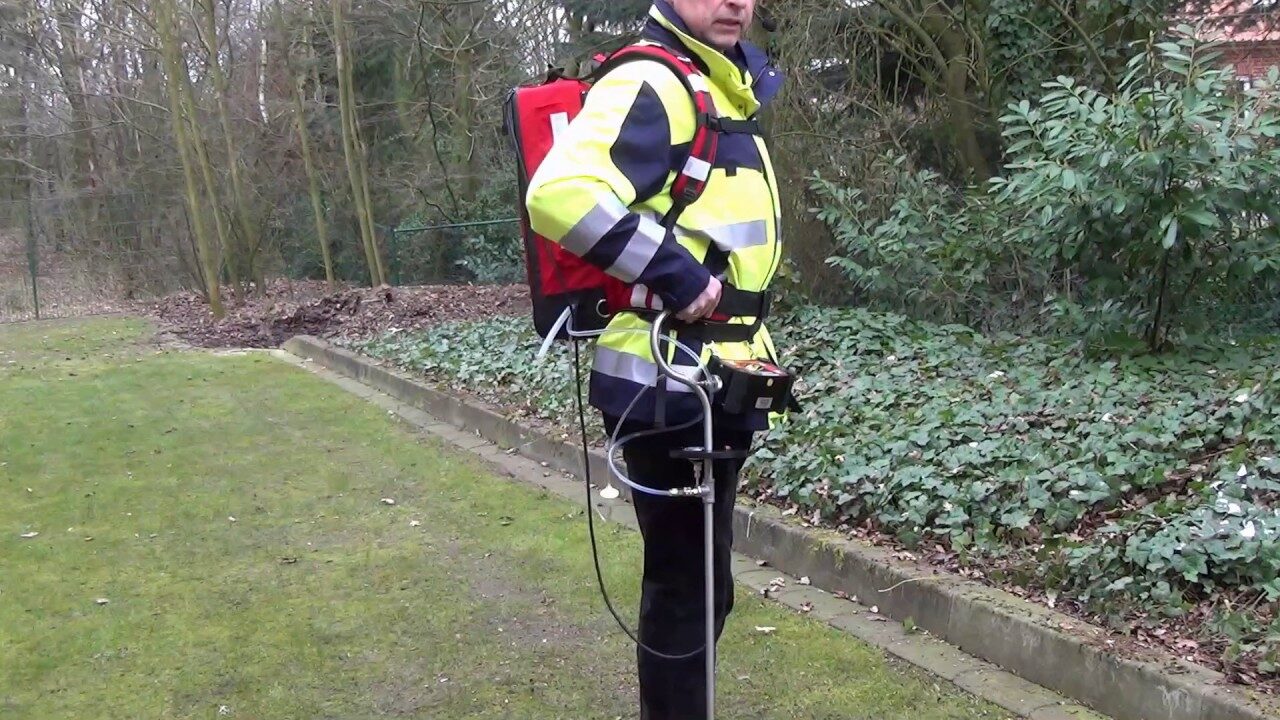
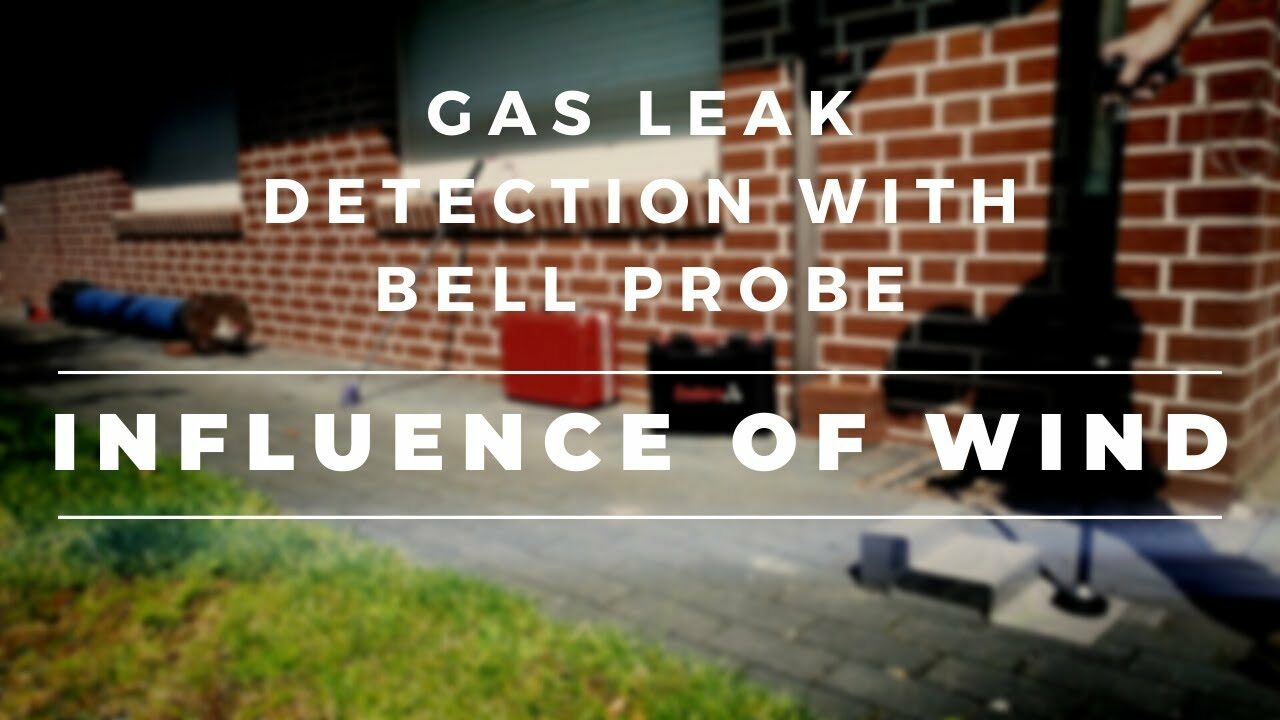
In the field of built-up areas and solid surfaces, the inspection with the so-called carpet probe has proven itself. The route is walked at a slow pedestrian pace.
If a gas leakage is detected, the classification is carried out according to worksheet G 465-3. The distance of the gas detection from a cavity or building is decisive for the classification.