

Leaking water pipes are often a source of stress, incur high costs and result in unnecessary waste of resources. It becomes particularly problematic when the leak cannot be pinpointed immediately, as exposing the entire length of the pipe is expensive and labour-intensive. This applies not only to underground garden irrigation systems, but also to water pipes inside buildings, beneath screed floors or behind walls.
There are many different causes of leaks. In addition to natural ageing processes, various external factors can damage the pipes and joints.
Common causes of pipe leaks
Frost damage
At low temperatures, water freezing inside pipes can cause significant damage. Garden irrigation systems from which the water has not been completely drained are particularly vulnerable to this.
Root ingrowth
Natural movements of the ground can put strain on pipework over the course of many years. Root growth can further exacerbate this strain and contribute to existing material weaknesses or micro-cracks developing into leaks.
Formation of deposits
Mineral deposits can reduce the internal diameter of pipes and cause localised pressure increases. At the same time, they place greater strain on seals and joints.
Corrosion
Old copper and iron pipes, in particular, can be affected by chemical or electrochemical processes. Material wear and pitting often lead to leaks that are difficult to detect.
Blockages and pressure spikes
Blockages in the pipework system can cause pressure fluctuations, which put strain on pipe joints, screw connections or seals.
Wear and material ageing
Seals, O-rings and fasteners are subject to a natural ageing process. As they age, materials can become porous or lose their elasticity.
When leaks cannot be found
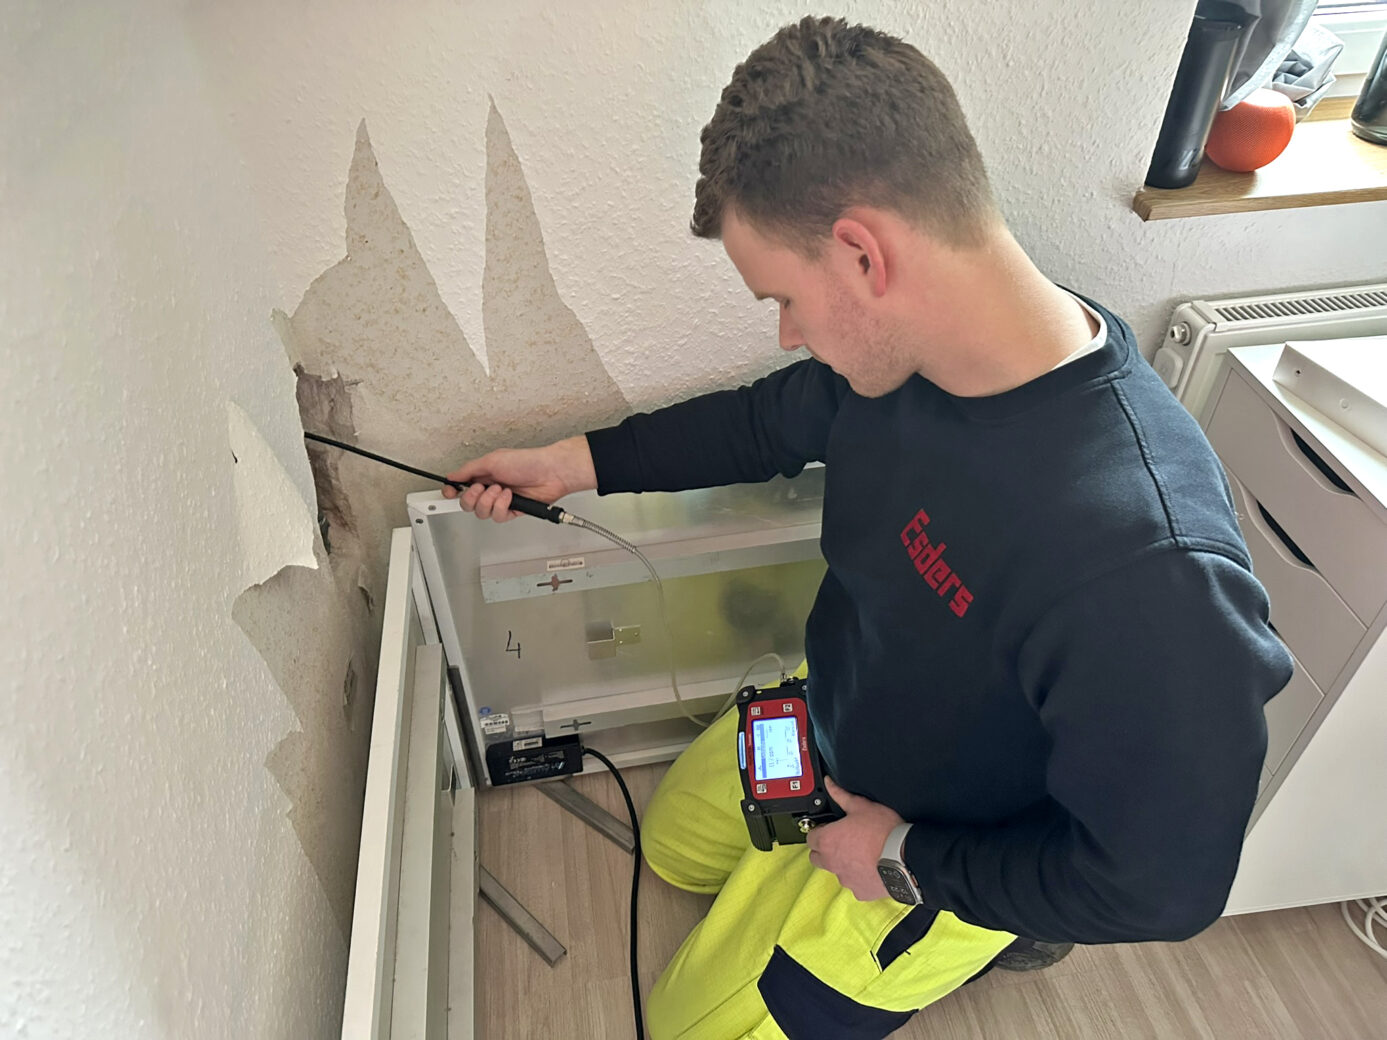
Whilst major damage is often indicated by visible water leaks, minor leaks frequently go undetected for a long time. The water seeps into the ground, collects on the floor slab and slowly penetrates the walls and building structures.
This usually means: wet walls, without knowing where the water is coming from.
Mould often forms in one part of the house, whilst the cause (the leak) is located elsewhere.
The consequences of leaks in drinking water systems are:
- Unnecessary water consumption
- Rising costs
- Mould indoors
- Damage to floor coverings, paths, patios or garden areas
Why traditional methods are often insufficient for locating a leak
Traditional leak detection methods often reach their limits, particularly with plastic pipes, complex pipework systems or installations that are difficult to access.
This makes it necessary to expose the pipes, turning the living area into a construction site. To avoid this, the tracer gas method offers a fast, reliable and precise way of locating leaks. Particularly in the case of underground plastic pipes, where acoustic methods often reach their limits, this procedure enables pinpoint localisation without the need for extensive excavation or exposure of the entire pipework system. You can read more about detecting leaks in water pipes using tracer gas here.
With the HUNTER Tracer Gas, even the smallest leaks can be reliably detected.
This saves time, conserves resources, reduces costs and stress levels, and minimises the need for repairs and the associated damage to the garden and interior.
Advantages of the tracer gas method in leak detection
Tracer gas (forming gas) is harmless to humans and the environment. It is:
- non-flammable, non-explosive
- non-corrosive
- non-toxic
- odourless
In the following practical example, we demonstrate leak detection on a garden irrigation system using HUNTER Tracer Gas. However, the steps described can also be applied to water pipes in buildings, underfloor heating systems, drinking water installations or other closed pipework systems.
Step 1: Preparing the irrigation system
Before the leak detection process begins, the relevant irrigation line is first disconnected from the regular water supply. The pipework is then drained as completely as possible.
This step is important to ensure that the tracer gas can spread freely throughout the pipework. The less residual water remains in the pipes, the quicker and more efficient the subsequent detection will be. However, it is also possible to carry out a leak detection with a partially filled pipe.
Even before the tracer gas is fed in, an inspection should be carried out to measure any existing concentrations and rule them out as leaks afterwards.
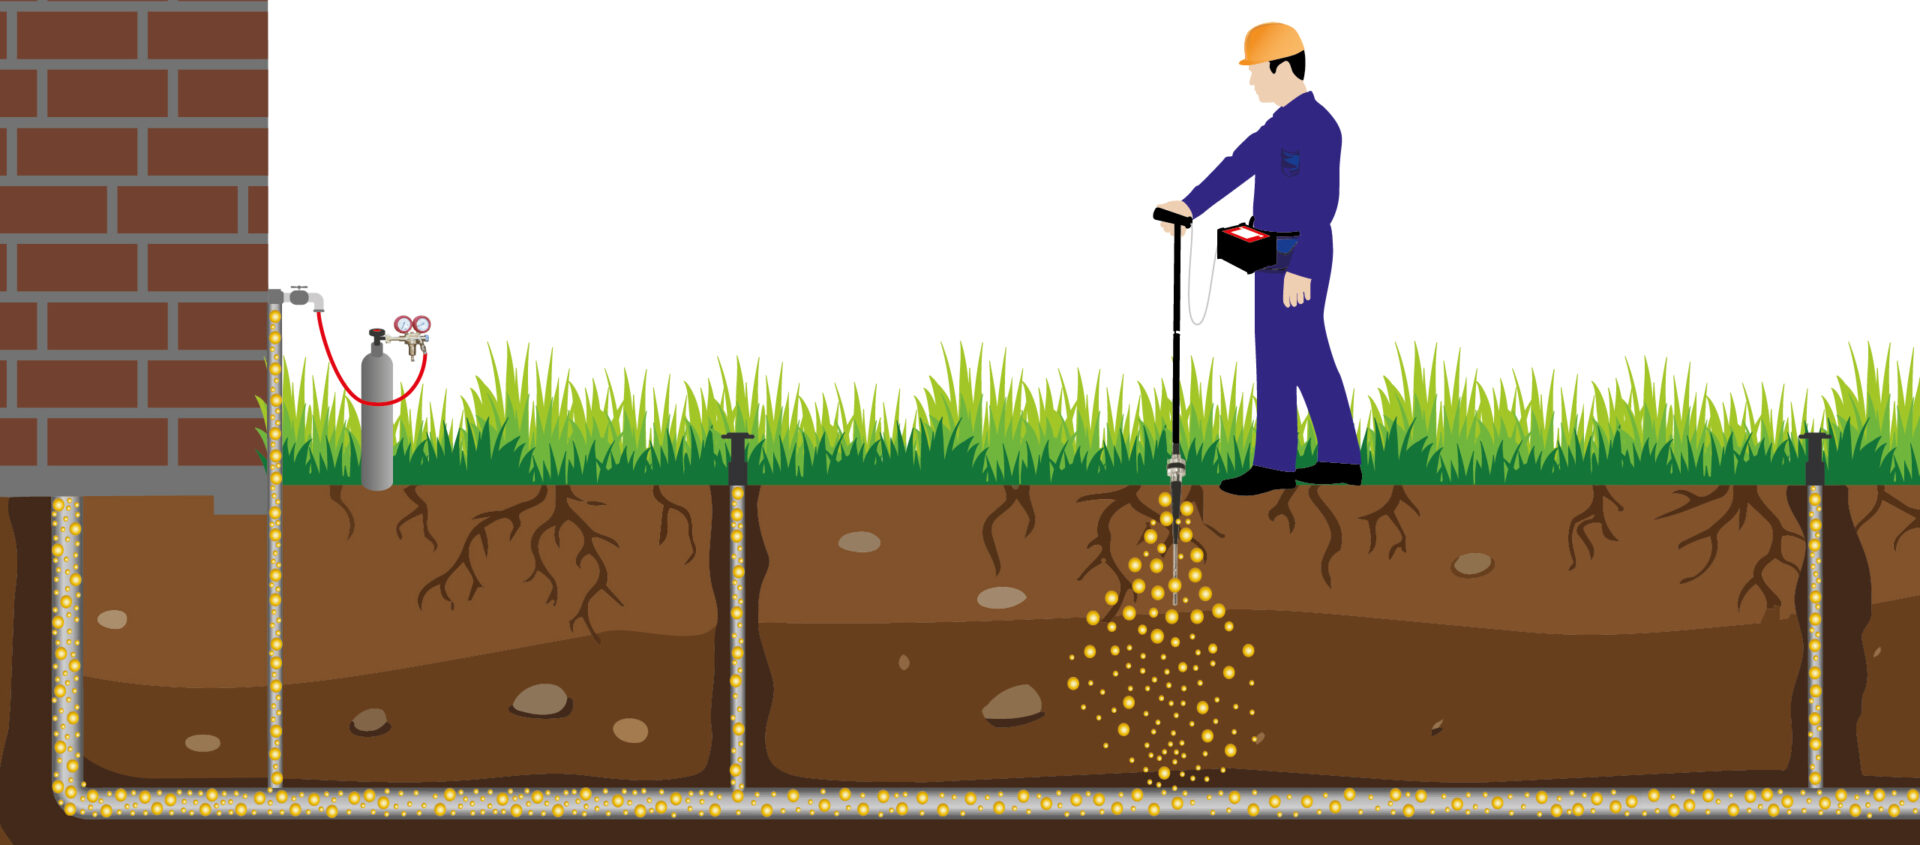
The tracer gas injection device is connected at a suitable point, for example at a connection to the irrigation system or a drainage point.
Step 2: Feeding of the tracer gas
So-called forming gas is used for leak detection. This usually consists of 5% hydrogen and 95% nitrogen. Due to its low hydrogen content, the gas mixture is non-flammable and can be used safely.
The tracer gas is controlled fed into the pipework system via a gas cylinder fitted with a pressure regulator. In the process, a defined test pressure is built up so that the gas can spread throughout the entire pipe network.
Step 3: Waiting for the gas to spread
Once fed into the system, the tracer gas takes some time to spread throughout the pipework. A measurement taken at the furthest point of the system is used to check whether the gas has spread completely throughout the system.
Once the pipework system is completely filled with tracer gas, the pressure is raised slightly using the tracer gas. The gas then begins to escape through any existing leaks. As hydrogen (H₂) is the smallest molecule and is lighter than air, it escapes to the surface even through the tiniest of leaks.
The required waiting time depends on various factors:
- Depth of the pipeline
- Soil conditions
- Size of the leak
- Length of the pipeline section
- Volume of gas injected
Particularly in loose soils, the hydrogen mixture rises very quickly. As hydrogen is significantly lighter than air, the gas accumulates at the surface directly above the leak.
Step 4: Leak detection using HUNTER Trace Gas
Now the actual leak detection begins.
Using HUNTER Trace Gas, the surface is systematically scanned along the suspected pipe route. The measurement device has a highly sensitive hydrogen sensor with a resolution of up to 0.1 ppm H₂ and reacts even to the slightest traces of escaping trace gas.
The user slowly moves a bell probe along the pipe route. As soon as elevated hydrogen concentrations are detected, the affected area can be pinpointed.
Particularly in the case of extensively branched garden irrigation systems, this method enables rapid preliminary localisation without having to excavate large areas.
Step 5: Precise localisation of the damaged area
Once the leak area has been narrowed down, the damaged area is precisely pinpointed under the ‘Localisation’ menu item using a borehole probe. The device utilises its integrated thermal conductivity sensor, which operates within a measurement range of 0.1 to 5.0 vol.% hydrogen.
To ensure precise localisation, the measurement is repeated in small sections. By comparing the measured concentrations, the point with the highest hydrogen concentration can be identified. This is usually located directly above the leak.
In the case of difficult ground conditions or particularly small leaks, additional measurements are carried out at shorter intervals using the borehole probe to determine the leak point even more precisely.
HUNTER Tracer Gas can be used for both wide-area searches and pinpoint localisation.
Next steps
Once the damaged section has been clearly identified, the necessary repair work can be carried out in a targeted manner. Instead of exposing large sections of the pipework, only the section that is actually affected needs to be exposed.
Following the repair, it is advisable to carry out another pressure test or a check measurement to confirm that the system is leak-free. The irrigation system can then be put back into operation.
Find out more about our tracer gas devices now
Request a consultation
Do you have any questions, or would you like to find out more about the devices?
Then simply fill in the form below to receive a personalised consultation.